A water softener manual provides essential guidance for understanding, installing, and maintaining your system. It explains components, setup, and operation, ensuring optimal performance and longevity of the unit.
Importance of Reading the Manual
Reading the water softener manual is crucial for understanding system operation, maintenance, and troubleshooting. It provides detailed instructions for installation, configuration, and optimal usage. The manual outlines essential steps to ensure the unit functions efficiently, saving time and money. By following the guidelines, users can prevent common issues and extend the system’s lifespan. It also explains how to measure water hardness, set regeneration cycles, and replenish salt. Regular maintenance procedures, such as cleaning the brine tank, are clearly described. Familiarizing yourself with the manual ensures proper performance and helps resolve problems quickly, avoiding costly professional interventions.
Overview of Water Softener Components
A water softener system typically consists of a mineral tank, control valve, resin beads, brine tank, and drain line. The mineral tank holds resin beads that remove hardness minerals like calcium and magnesium. The control valve manages water flow and regeneration cycles. Resin beads are coated with sodium ions, capturing hardness minerals during the softening process. The brine tank stores salt solution used to recharge resin beads. The drain line directs wastewater during regeneration. Understanding these components is essential for proper system operation and maintenance, ensuring efficient water softening and prolonged system lifespan.
Understanding Water Hardness and Softening Process
Water hardness refers to the presence of minerals like calcium and magnesium. Softening involves removing these minerals using resin beads, which exchange them for sodium ions, producing soft water.
How to Measure Water Hardness
Measuring water hardness is crucial for configuring your softener correctly. Use test strips or a digital hardness tester to determine mineral levels in parts per million (ppm). Simply dip the strip in water or use the tester, and compare the color or reading to the provided chart. Accurate measurement ensures proper system setup. High levels of calcium and magnesium indicate harder water, requiring precise softener calibration. Refer to your manual for specific instructions, as different models may have unique requirements. Regular testing helps maintain optimal water quality and system performance over time.
Types of Water Hardness and Their Effects
Water hardness is categorized into soft, moderately hard, hard, and very hard, measured in parts per million (ppm) or milligrams per liter (mg/L) of calcium and magnesium. Soft water (0-60 ppm) is ideal for cleaning and appliances. Moderately hard (61-120 ppm) water may cause mild scaling. Hard water (121-180 ppm) leads to visible buildup in pipes and reduced soap efficiency. Very hard water (above 180 ppm) significantly damages appliances and plumbing. Understanding your water type helps configure your softener correctly, preventing long-term damage and ensuring optimal performance for household needs.

The Role of Resin Beads in Softening
Resin beads are a critical component in water softening, functioning as exchange media. They are typically coated with sodium ions and attract calcium and magnesium ions from hard water. As water flows through the mineral tank, the resin beads trap hardness minerals, replacing them with sodium ions, thus softening the water. Over time, the beads become saturated with calcium and magnesium, requiring regeneration. During regeneration, a brine solution rinses the beads, restoring their sodium coating and preparing them for continued use in softening water effectively.

Installation and Setup Guide
Installing a water softener involves connecting it to your water supply lines and setting up the bypass valve. Ensure all connections are secure to avoid leaks and improper function. Always consult the manual for specific installation requirements and follow safety precautions to guarantee a successful setup and optimal performance of the system.
Step-by-Step Installation Instructions
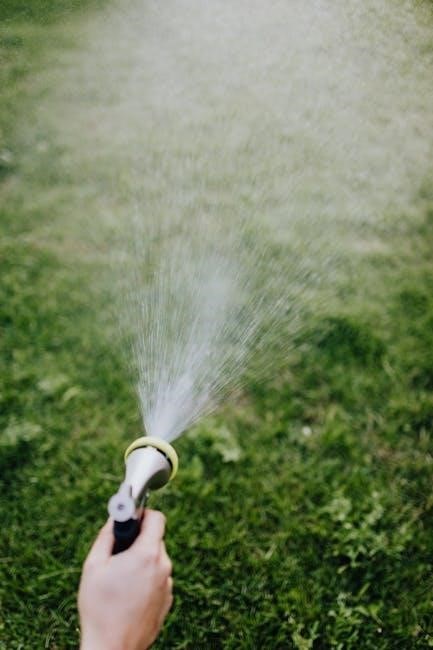
Begin by locating the ideal installation spot for your water softener, ensuring easy access to water supply lines and a drain outlet. Shut off the main water supply before starting. Connect the inlet and outlet pipes to the softener, securing them tightly to prevent leaks. Attach the drain line to the unit and ensure it flows freely. Follow the manual’s bypass valve instructions to connect it correctly. Once all connections are secure, turn the water supply back on and check for leaks. Finally, test the system by running water through a faucet to ensure proper function and softening efficiency.
Initial Setup and Configuration
After installation, refer to your manual for initial setup instructions. Begin by measuring your water hardness using a test strip or digital tester. Enter this value into the control panel to set the softening level. Program the regeneration cycle based on your water usage and household size;Many systems allow you to choose between time-initiated or demand-initiated regeneration; Fill the brine tank with the recommended type and amount of salt. Follow the manual’s guidance to set additional features like flow rates or advanced modes. Finally, run a test cycle to ensure the system operates correctly and adjust settings as needed for optimal performance.
Connecting to Water Supply Lines
Connecting your water softener to the supply lines is a critical step. Begin by turning off the water supply to your home. Locate the inlet and outlet valves on the softener. Attach the inlet line to the mains water supply and the outlet line to your home’s water distribution system. Ensure all connections are secure and watertight to prevent leaks. If your system includes a bypass valve, connect it according to the manual’s instructions. Double-check all connections before turning the water supply back on. Allow the system to pressurize before testing the water flow to ensure proper operation;

Maintenance and Upkeep
Regular maintenance ensures optimal performance. Refill salt, clean the brine tank, and check system components. Schedule regeneration cycles and monitor water softener efficiency for consistent results.
Scheduling Regeneration Cycles
Scheduling regeneration cycles is crucial for maintaining your water softener’s efficiency. Most systems offer time-initiated or demand-initiated regeneration. Time-initiated cycles run at set intervals, while demand-initiated cycles activate based on water usage. Adjust settings according to your household’s water consumption and hardness levels. Ensure the cycle duration and frequency align with the manufacturer’s recommendations. Monitoring your water usage patterns can help optimize regeneration schedules. Regularly review and update settings to accommodate changes in water demand. Proper scheduling prevents overworking the system and ensures consistent soft water delivery; Always refer to your manual for specific instructions on adjusting regeneration cycles.

Refilling Salt and Cleaning the Brine Tank
Regularly refilling salt and cleaning the brine tank is essential for your water softener’s performance. Ensure the brine tank is always filled with high-quality salt designed for water softeners. Avoid using table salt or unauthorized products, as they may cause system issues. Clean the brine tank every few months by draining it completely and rinsing with fresh water. Use a water softener cleaner as recommended in your manual to remove any buildup. After cleaning, refill the tank with the specified amount of salt. Always check for residual salt in the tank before refilling to prevent overfilling, which can lead to clogs or inefficiency.
Regular System Checks
Regular system checks are crucial for maintaining your water softener’s efficiency. Monitor water hardness levels using test strips or a digital tester to ensure optimal performance. Check salt levels in the brine tank and refill as needed. Inspect the resin beads for any signs of wear or contamination. Look for leaks or unusual noises that may indicate issues. Clean or replace filters if necessary. Review error messages on the control panel and address them promptly. Schedule professional maintenance annually to ensure everything functions correctly. Always consult your manual for specific guidance tailored to your system.
Troubleshooting Common Issues
Troubleshooting common issues with your water softener involves identifying error messages, conducting system checks, and referencing your manual for solutions to ensure optimal performance and address any malfunctions promptly.
Identifying and Resolving System Errors
Identifying system errors in your water softener involves checking for error codes, low water pressure, or increased hardness. Refer to your manual to understand specific error messages. Common issues include salt bridge formation or resin bead blockage. To resolve, ensure the brine tank is filled with quality salt and clean the resin beads periodically. Restart the regeneration cycle if the system malfunctions. If problems persist, consult the troubleshooting section of your manual or contact a professional for assistance. Regular maintenance and timely interventions can prevent major breakdowns and ensure smooth operation.
Common Problems and Solutions
Common issues with water softeners include salt bridges, resin bead blockage, and low water pressure. To fix a salt bridge, break it with a stick and refill the brine tank. For resin bead blockage, clean the resin bed annually. If water pressure drops, check for clogged filters or valves. Error codes often indicate specific malfunctions, such as sensor issues or system faults. Refer to your manual for code meanings and solutions. Regular maintenance, like refilling salt and cleaning the brine tank, prevents many problems. Addressing issues promptly ensures efficient operation and extends the system’s lifespan.
When to Call a Professional
If your water softener displays error codes or malfunctions despite troubleshooting, consult a professional. Significant damage, such as cracked tanks or corroded pipes, requires expert repair. If the system consistently underperforms or salt levels fluctuate unpredictably, professional diagnosis is recommended. Additionally, if you’re unsure about complex settings or regeneration issues, seeking help ensures proper resolution. Regular maintenance by a professional can prevent long-term damage and optimize system performance. Don’t hesitate to contact an expert if issues persist or worsen over time, as delays may lead to costly repairs or reduced water quality.


0 Comments