Speed Queen washing machines are known for their durability, but like any appliance, they can experience issues. This guide helps identify and resolve common problems, ensuring optimal performance and extending the machine’s lifespan through regular maintenance and timely repairs.
By addressing issues early, you can prevent minor problems from becoming major repairs. This manual provides step-by-step solutions for common issues, helping you troubleshoot effectively and keep your washer running smoothly.
1.1. Importance of Regular Maintenance
Regular maintenance is crucial for ensuring optimal performance and extending the lifespan of your Speed Queen washing machine. Cleaning the lint filter and inspecting hose connections can prevent issues like leaks or poor drainage. Additionally, routine checks help identify potential problems early, reducing the risk of costly repairs and ensuring your washer operates efficiently for years to come.
1.2. Common Issues and Solutions
Speed Queen washers may face issues like leaks, vibration, or error codes. Regular maintenance, such as cleaning filters and checking connections, can often resolve these problems. Addressing issues promptly prevents major repairs. Troubleshooting guides provide step-by-step solutions, empowering users to fix common problems independently and maintain their washer’s efficiency and longevity.
Washer Not Turning On
If your Speed Queen washer won’t turn on, check the power supply, ensure the outlet is working, and verify the circuit breaker hasn’t tripped. Inspect the control panel for any visible damage or issues.
2.1. Checking Power Supply
Ensure the washer is properly plugged into a functioning outlet. Verify that the power cord is secure and undamaged. If using an extension cord, make sure it’s rated for the washer’s power requirements. Check your home’s circuit breaker or fuse box to confirm the circuit hasn’t tripped or blown. Reset the breaker if necessary.
2.2. Inspecting the Control Panel
Check the control panel for any visible damage or loose buttons. Ensure all lights and the digital display are functioning correctly. Look for error codes and consult the manual for their meanings. Clean the panel if dirty, as grime can interfere with button responsiveness. Verify that all selections are registering properly. This step ensures the washer’s brain is operating smoothly.
2.3. Verifying Circuit Breaker and Outlet
Check the circuit breaker to ensure it hasn’t tripped. If it has, reset it and test the washer. Also, verify the outlet is functioning by plugging in another appliance. Ensure the washer is properly connected to a grounded outlet. If issues persist, consult the manual or contact a professional for further assistance.

Speed Queen Washer Leaking Water
Speed Queen washers may leak due to improper leveling, loose connections, or worn parts. Ensure the machine is level, inspect hoses, and check for damage. Persistent issues may require professional attention.
3.1. Ensuring Proper Leveling
Proper leveling is crucial to prevent leaks and ensure stable operation. Use a level tool to check balance and adjust the washer’s legs as needed. Ensure all four legs touch the floor firmly. If the machine isn’t level, it may vibrate excessively or leak water during cycles. Recheck leveling after adjustments to confirm stability.
3.2. Inspecting Hose Connections
Check the water supply hoses for tightness and signs of wear. Ensure all connections to the washer and water supply are secure. Look for cracks, frays, or mineral buildup. If damaged, replace the hoses immediately. Turn off the water supply before inspecting or replacing hoses to prevent water leakage. Regular inspections help maintain proper function and prevent potential leaks.
3.3. Replacing Faulty Pump or Clamps
If the pump or clamps are damaged, water leakage can occur. Turn off power and water supply. Disconnect hoses and access the pump. Inspect for cracks or wear. Replace faulty parts with genuine Speed Queen components; Tighten clamps securely. Ensure proper alignment to prevent future leaks. Consult the manual for specific instructions or contact a professional if unsure.
Error Codes and Their Meanings
Speed Queen washers display error codes like “Er” or “Dr” to indicate issues. These codes help diagnose problems, from drainage faults to sensor malfunctions. Refer to your manual for specific code meanings and solutions to address the issue effectively and restore proper function to your machine.
4.1. Understanding “Er” and “Dr” Codes
The “Er” and “Dr” codes on your Speed Queen washer indicate specific issues. “Er” often relates to errors in the machine’s operation, such as communication faults or sensor problems. “Dr” typically signifies a drainage issue, meaning the washer isn’t draining water properly. These codes guide you to the root cause, allowing targeted troubleshooting for effective resolution. Always consult your manual for precise definitions and solutions to ensure optimal performance and prevent further damage to your appliance.
4.2. Resetting the Washer After Power Outages
After a power outage, your Speed Queen washer may display error codes like “OF” or blink lights erratically. To reset, unplug the washer for 15 seconds to clear the memory. Plug it back in and run a short cycle to test functionality. Ensure the power source is stable before restarting. This simple process often resolves post-outage issues effectively.

Vibration and Imbalance Issues
Vibration issues often arise from improper balancing or overload. Ensure the washer is level and redistribute laundry load evenly to prevent excessive vibrations during operation.
5.1. Balancing the Washer
Proper balancing is crucial for smooth operation. Ensure the washer is installed on a level surface using its adjustable legs. If vibrations occur, check and tighten the legs, and redistribute the laundry load to maintain balance during cycles. This prevents damage and ensures efficient washing performance.
5.2. Diagnosing Vibration Sensor Problems
If your Speed Queen washer vibrates excessively, the vibration sensor may detect imbalance. Ensure the washer is level and properly installed. Check for loose connections or blockages. Consult your manual for sensor reset instructions or contact a professional if issues persist. Proper sensor function is essential for smooth operation and preventing damage.

Speed Queen Washer Making Noise
Noise issues in Speed Queen washers often stem from loose parts or worn bearings. Identifying and addressing these problems promptly can prevent further damage and ensure smooth operation.
6.1. Identifying Loose Parts
Loose parts are a common cause of noise in Speed Queen washers. Check the agitator, tub, and drum for any loose objects. Ensure all screws and bolts are tightened properly. If foreign objects like coins or buttons are present, remove them immediately to prevent damage and noise during operation.
6.2. Checking for Worn-Out Bearings
Worn-out bearings can cause excessive noise and vibration in your Speed Queen washer. Inspect the bearings for signs of wear or damage. If you notice grinding noises or uneven spinning, the bearings may need replacement. Regular lubrication and maintenance can prevent premature wear, ensuring smoother operation and reducing noise levels significantly over time.
Always refer to your Speed Queen manual for specific instructions on bearing inspection and replacement. If unsure, consult a professional to avoid further damage to the machine.
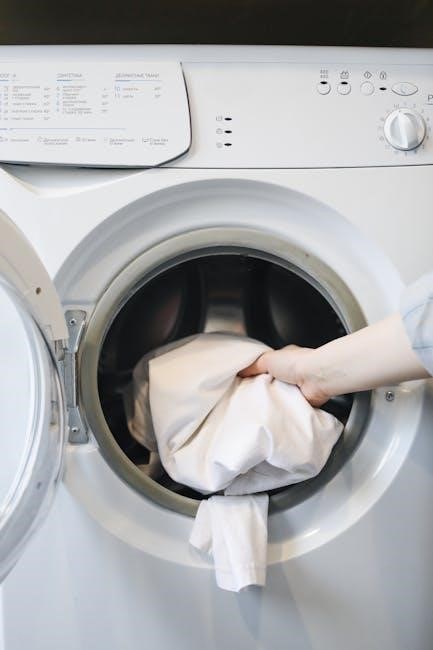
White Spots on Laundry
White spots on laundry can result from detergent residue or lint buildup. Regularly cleaning the lint filter and using the correct detergent type helps resolve this issue.
- Check detergent dosage to avoid overuse.
- Ensure proper rinsing cycles are functioning.
7.1. Cleaning the Lint Filter
Cleaning the lint filter is essential for preventing white spots on laundry. Located between the inner and outer tub, it captures lint during wash cycles. Regularly remove and rinse it with water to ensure proper function and maintain clean laundry. This simple maintenance step can prevent buildup and improve washing efficiency over time.
7.2. Using the Correct Detergent
Using the correct detergent is crucial for optimal performance. Choose a low-sud, HE-compatible detergent to prevent excessive foam and residue buildup. Avoid overloading with detergent, as this can leave white spots on laundry. Measure detergent according to load size and fabric type. Incorrect detergent use can lead to poor cleaning results and potential issues like clogged filters or imbalance during cycles.
Moving and Storing the Washer
Properly prepare your Speed Queen washer for moving or storage by draining water, securing parts, and ensuring it’s clean. Store it upright in a dry, cool place to maintain functionality and prevent damage during relocation or extended periods of inactivity.
8.1. Preparing for Transportation
Before moving your Speed Queen washer, ensure it’s properly prepared to prevent damage. Drain all water by performing a manual drain or running a drain cycle. Secure the lid tightly and tape it shut. Remove any loose items from the washer drum. Disconnect and drain hoses to avoid leaks during transport. Wrap the machine securely to protect it from scratches and shocks. Keep the washer upright to maintain balance and prevent internal damage. Ensure all electrical components are dry to avoid short circuits. Consider hiring professional movers if the washer is heavy or if you’re unsure about handling it safely.
8.2. Proper Storage Techniques
Store your Speed Queen washer in a dry, well-ventilated area to prevent rust and mold. Keep the lid open slightly to allow moisture to evaporate. Ensure the machine is clean and dry, with all hoses and electrical components secured. Store it upright to maintain balance and prevent internal damage. Regularly inspect for any signs of wear or pests.
Speed Queen Washer Not Draining
A clogged drain hose, faulty pump, or kinked hose can prevent proper draining. Check connections, ensure hoses are clear, and verify the pump’s functionality to resolve the issue.
9.1. Checking the Drain Hose
Ensure the drain hose is securely connected to the washer and drainpipe. Check for kinks, twists, or blockages. Straighten any bends and clear debris to restore proper water flow during drainage cycles.
9.2. Performing a Manual Drain
To manually drain your Speed Queen washer, unplug it and locate the drain hose. Place a shallow pan or bucket at the bottom. Slowly tilt the washer to allow water to flow through the hose into the pan. This process prevents further damage and prepares the washer for troubleshooting or repairs.

Resetting the Washer Timer
If the timer malfunctions, unplug the washer for 15 seconds to reset it. This often resolves issues caused by power outages or interrupted cycles. Ensure the timer is functioning properly by consulting the manual for specific reset instructions.
10.1. Understanding the Timer Function
The timer is essential for controlling the washing cycle. It ensures each phase (wash, rinse, spin) runs smoothly and efficiently. If the timer stops advancing, the washer may not complete cycles. Always check if the timer knob is functioning correctly and refer to the manual for detailed instructions on proper usage and troubleshooting techniques.
10.2. Resetting the Timer Knob
To reset the timer knob, unplug the washer and wait 15 seconds. Plug it back in and ensure the knob is properly aligned with the cycle selector. If the timer stops advancing, check for obstructions or mechanical issues. Resetting the timer knob can resolve cycle interruption issues, ensuring smooth operation. Consult the manual for detailed reset procedures if problems persist.

When to Call a Professional
Call a professional if you encounter complex electrical issues, major mechanical failures, or safety concerns. DIY repairs can risk further damage or void your warranty.
11.1. Complex Electrical Issues
Complex electrical issues, such as malfunctioning motors, faulty wiring, or control panel errors, require professional expertise. These problems can pose safety risks and may necessitate specialized tools and knowledge to resolve effectively without causing further damage or hazards.
11.2. Major Mechanical Failures
Major mechanical failures, such as a seized motor, broken belts, or faulty bearings, often require professional intervention. These issues can lead to significant operational disruptions and may necessitate extensive repairs or even component replacements to restore functionality and prevent further damage to the washing machine.

Speed Queen Washer Maintenance Tips
Regular maintenance is key to extending your Speed Queen washer’s lifespan. Clean the lint filter, check door seals, and ensure proper leveling to maintain optimal performance and prevent breakdowns.
12.1. Cleaning the Lint Filter Regularly
Regularly cleaning the lint filter is essential for your Speed Queen washer’s efficiency. Locate the filter between the inner and outer tub, remove accumulated lint, and rinse with water. This simple step prevents clogs, reduces wear on internal components, and ensures proper water flow during cycles. Perform this task after each use to maintain optimal performance.
12.2. Checking and Replacing Seals
Regularly inspect the seals around the washer’s lid, drum, and hoses for signs of wear, cracks, or moisture. Clean them gently to remove debris. If damaged, replace the seals promptly to prevent leaks and water damage. Ensure all replacements are genuine Speed Queen parts for optimal performance and longevity. Addressing worn seals early helps maintain your washer’s reliability and efficiency.
By following this guide, you can effectively troubleshoot and maintain your Speed Queen washer. For further assistance, visit Speed Queen’s official website or consult their support team for detailed manuals and expert guidance.
13.1. Final Tips for Optimal Performance
Regularly clean the lint filter and check for blockages. Ensure the washer is properly leveled to prevent vibrations. Use the recommended detergent dosage and avoid overloading. Perform routine checks on hoses and connections to prevent leaks. Refer to the manual for specific maintenance schedules. These practices will help extend the lifespan of your Speed Queen washer and ensure consistent performance.
13.2. Accessing Speed Queen Manuals and Support
Visit the official Speed Queen website to access manuals, installation guides, and troubleshooting resources. Use the document portal to search for specific models. For further assistance, contact customer support through their contact form or visit a Queen Laundry store. Refer to your manual for detailed instructions or reach out to Speed Queen support for unresolved issues.


0 Comments